Jobsite Organization Hacks Using SmartWire
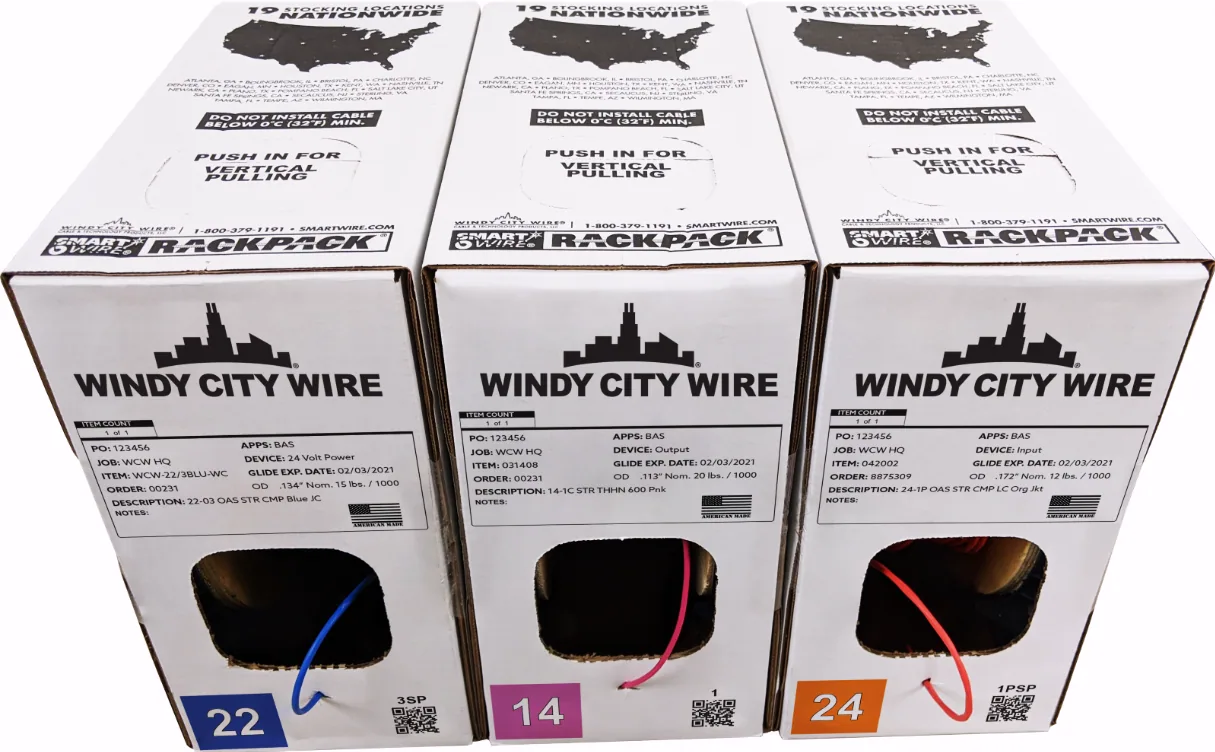

If you’ve ever lost an afternoon to tangled bundles, mystery cables, or backtracking through a building to figure
out what goes where—you’re not alone. The good news: a few simple workflows, paired with SmartWire’s sequential
footage markings, can turn chaos into a crisp, predictable install.
This guide focuses on three high-impact habits:
-
Pre-measure by footage marks
-
Label at the pull
-
Match to floor plans
Use the playbook below to tighten up your install times, reduce rework, and hand off clean as-builts every time.
What is SmartWire (in 10 seconds)?
SmartWire low-voltage cable
features sequential footage marks printed along the jacket. Those marks make it easy to measure, cut, stage, track
usage, and verify lengths—without wheel tapes or guesswork. The tips below show you how to build efficient workflows
around those marks.
-
Pre-Measure by Footage Marks: Cut Right, Pull Once Pre-measuring is the single biggest time-saver you’ll get from SmartWire. Instead of measuring runs manually, use the printed footage marks to stage precise lengths—before you ever enter a riser or ceiling space.
Quick workflow
-
Build a cut sheet from the floor plan:
-
List every device/drop with start and end (IDF/closet → room/outlet).
-
Add estimated pathway length from plan scale and riser paths.
-
Add slack policy (e.g., closet: +10–15 ft; device end: +6–8 ft; vertical transitions: +3–5 ft).
-
Finalize a “cut length” per run.
-
Stage by zones:
-
Group runs by area or pathway (East corridor, West office bank, Cameras on 2nd floor, etc.).
-
Prioritize by longest-first to ensure reel capacity; shorter runs fill in with offcuts.
-
Cut from the box/reel using the footage marks:
-
Note the start footage number.
-
Pull until you hit the target difference on the jacket (e.g., +178 ft).
-
Cut. Tag that cut with the run ID immediately.
-
Coil cleanly:
-
Figure-eight or loose coil with a center tie to avoid kinks.
-
Use a colored tie to match the zone (color code legend below).
Why it works
-
Accuracy: You pull exactly what you need—no more, no less.
-
Speed: Zero tape-measuring on ladders. No walking runs twice.
-
Less scrap: Tight cuts minimize leftovers.
-
Simplicity: New team members can follow a clear, repeatable process.
Pro tips
-
Overcut spares from offcuts: Keep a bin of 20–60 ft leftovers. They’re perfect for patching, test lanyards, future adds, or short device runs.
-
Track remaining cable: When you start a reel/box, log the footage number. Subtract each cut length so you always know what’s left without weighing or guessing.
-
Label at the Pull: Never Lose Identity If a cable isn’t labeled, it doesn’t exist. The fastest way to lose hours is to wait until “later” to label. Instead, label while you pull—before the cable disappears into the wall or ceiling.
Golden rules
-
Two-label minimum:
-
Label both ends of each run as soon as they’re accessible (closet end and device end).
-
If you must leave a cable unterminated, apply temporary labels now and upgrade later.
-
Mirror the labels:
-
The exact same ID must appear on both ends (same characters, same formatting).
-
Avoid abbreviations that might be interpreted two ways later.
-
Use durable labels:
-
Wrap-around labels or heat-shrink sleeves are best for permanence.
-
For rough-in stages, painter’s tape + Sharpie works as a temporary placeholder—but always replace with permanent labels before closeout.
Labeling workflow during the pull
-
Pre-print label sets from your cable schedule (see Section 3):
-
One set per run, with duplicates for both ends and a spare.
-
As the feeder pushes and the puller receives:
-
The puller applies the device-end label immediately after the cable clears the pathway.
-
The feeder applies the closet-end label the moment it’s cut/landed in the closet.
-
Bundle ID cards:
-
When pulling multi-run bundles, hang a small bundle card listing all run IDs in that bundle. This makes mid-pull verifications painless.
-
Change control:
-
If you deviate from the plan (field reroute, device relocation), update the label at once. Never “fix it in the paperwork later.”
Pro tips
-
Labeling pen discipline: Use a bold, alcohol-resistant marker for field notes on temporary labels. Avoid water-based inks.
-
Sleeve + wrap: For mission-critical runs, combine a printed sleeve beneath a clear wrap for double durability.
-
Match to Floor Plans: Bring Order to IDs and As-Builts Your labels are only as good as your map. A clean naming convention and a simple cable schedule turn SmartWire’s field efficiency into crisp documentation.
Recommended naming convention
-
Format example: B1-L2-203-AP-01
-
B1: Building 1
-
L2: Level 2
-
203: Room or grid zone
-
AP: System/device type (AP, CAM, READER, DS, SPKR, TV, WAP, DATA, FA, etc.)
-
01: Run number for that device type in that location
Keep it consistent:
-
Always left-pad numbers (01, 02, … 10) to align lists and avoid sorting problems.
-
Use standardized device codes across projects. Make a one-page legend.
Create a simple cable schedule
-
Columns:
-
Run ID (matches label)
-
System (e.g., CCTV, Access, Wi-Fi, AV)
-
Closet/Panel Origin (IDF/Rack/Port, if known)
-
Destination (Room/Device/Coordinates)
-
Planned Length (ft) + Slack Policy
-
Cut Length (ft)
-
Actual Pulled (ft) from SmartWire marks
-
Status (Cut, Pulled, Tested, Terminated)
-
Notes/Changes
-
Use conditional formatting (green = done, yellow = in progress, red = hold) for quick stand-ups.
-
Tie this schedule to the plan page and viewport index so anyone can cross-reference fast.
Plan markup best practices
-
Color-code by system:
-
Blue = Data/Wi-Fi, Red = Access, Purple = AV, Orange = CCTV, Green = Control, etc.
-
Highlighter pass:
-
Highlight each drop on the plan as soon as it’s labeled in the field.
-
Use the same color as the system for instant context.
-
As-built discipline:
-
If a device relocates or a pathway changes, add a cloud and note on the plan the same day.
-
Update the run ID if needed (with supervised change control) so labels and maps never drift apart.
Pro tips
-
QR codes: If your team uses digital tracking, print a small QR on the label that links to the run’s row in your schedule (Google Sheet, PM tool, etc.).
-
Panel port mapping: Create a panel map with port numbers aligned to run IDs. Tape a printed copy inside the door until final labels are in.
Bonus: Crew Roles That Speed Everything Up Define roles by task, not by seniority:
-
Feeder: Manages the SmartWire box/reel, reads/records footage marks, calls out lengths.
-
Puller: Receives at destination, applies device-end labels immediately, verifies pathway.
-
Tagger: Applies closet-end labels, groups by panel/patch, updates the cable schedule in real time.
-
Floater/Spotter: Clears snags, protects corners, documents pathway photos for as-builts.
This division turns a three-person crew into a smooth assembly line.
Daily Checklists
Before you roll in
-
Print the cable schedule, label sets, and plan sheets for each zone.
-
Verify SmartWire reel/box inventory and remaining footage.
-
Prep label materials: permanent wrap labels, temp painter’s tape, Sharpies, clear wrap.
-
Stage pull hardware: rollers, corner guards, rod/rods, string, fish tape, pull lubricant (if applicable).
-
Identify closet landing areas and temporary cable management (J-hooks, Velcro ties).
-
Brief the team on naming convention and zone order.
During the day
-
Cut from SmartWire using footage marks only—no eyeballing.
-
Label both ends at the pull—no exceptions.
-
Update the schedule after each run or bundle.
-
Take photos of pathways, penetrations, and final device rough-in.
End of day
-
Reconcile actual footage used vs. planned on the schedule.
-
Mark up as-builts and highlight completed drops.
-
Secure coils by zone, keep leftovers labeled by length.
-
Note any changes for GC/owner updates.
Common Pitfalls (and How to Avoid Them)
-
Pulling before labeling: Always label as soon as it’s cut/landed. It’s the fastest moment to do it right.
-
Sloppy naming: If two runs share a nearly identical ID, someone will punch the wrong port. Keep IDs clear and standardized.
-
No slack policy: Decide slack targets before cutting. Document them on the schedule for consistency across the crew.
-
Ignoring SmartWire marks mid-pull: If you need to verify how much is left to reach a device, glance at the jacket. It saves walking and guessing.
-
Unmanaged offcuts: Label leftover lengths and store by size. They become instant time-savers later.
Example: From Plan to Pull (Mini Walkthrough)
-
You have 12 WAP drops on Level 2, East wing. The plan shows a 140–190 ft pathway range to the IDF.
-
In your schedule, you set a standard slack policy: +12 ft IDF, +8 ft device, +3 ft vertical transitions.
-
Your cut sheet outputs cut lengths from 163–213 ft. You sort by longest-first.
-
At the reel, the feeder starts at the current footage mark and pulls until the difference equals the cut length, then cuts and tags “B1-L2-EAST-WAP-01.”
-
The puller receives the cable, applies the device-end label, tapes a small location card on the ceiling grid above, and highlights the plan.
-
Back at the closet, the tagger applies the closet label, groups cables by system, and updates the schedule with “Actual Pulled” using SmartWire marks.
-
By lunch, 12 drops are cut, pulled, labeled, and logged. No guessing, no relabeling, and clean as-builts in progress.
Simple Color Code Legend (Crew-Wide)
-
Blue tie/marker: Data/WAP
-
Red: Access Control
-
Orange: CCTV
-
Purple: AV/HDMI
-
Green: Control/Automation
-
Yellow: Fire/Notif (observe AHJ/code labeling rules)
Keep the legend taped inside the pull box lid or on the cart so everyone uses the same system.
Why This Works
-
Visual control: Labels and plan highlights make status obvious.
-
Single source of truth: The cable schedule ties labels, lengths, and locations together.
-
Measured certainty: SmartWire’s sequential footage marks turn estimating into accounting.
-
Fewer touchpoints: Pre-measure, label at the pull, and match to plans means you rarely handle a run more than once.
Get started with SmartWire
-
See how SmartWire streamlines pre-measuring, labeling, and as-builts:
https://windycitywire.com/solutions/smartwire-overview
-
Prefer to talk it through? Contact your local Windy City Wire sales rep and we’ll help you build a cut sheet, labeling plan, and schedule for your next job.
